Molding Hogwarts House Crests in White Chocolate
14 Mar 2015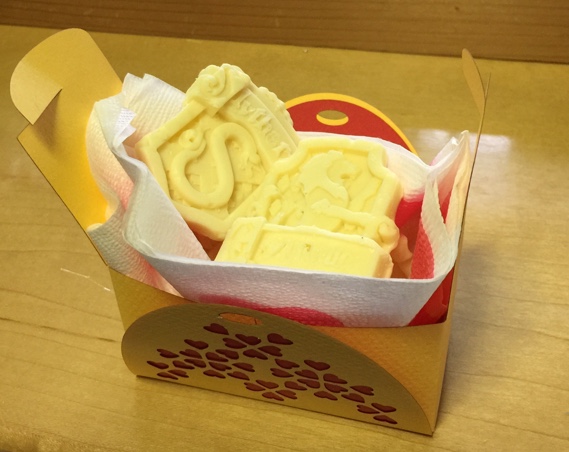
In Japan is customary for women to give men chocolates on Valentine’s Day, and men to return the favour with white chocolate on March 14, White Day. It’s easy enough to pop down to the store and buy a few boxes of chocolate, but it displays a certain lack of imagination. This year, all the women I will be giving chocolates to this year are Harry Potter fans and so I figured that some appropriately shaped chocolates would be in order. Luckily Anna Kaziunas France from the FabLab network has a great instructable on molding white chocolate skulls and I came across some great house crest models on (where else) Thingiverse that fit the bill.
BOM
- Access to a 3d printer
- Mold maker stl files
- RTV-2 MSR3400 Silicon
- meiji white chocolate
- Alcohol for cleaning
- 3 Paper cups
- Pliers
- A disposable stirrer
- Food or IR thermometer
- Double boiler or pot with glass mixing bowl
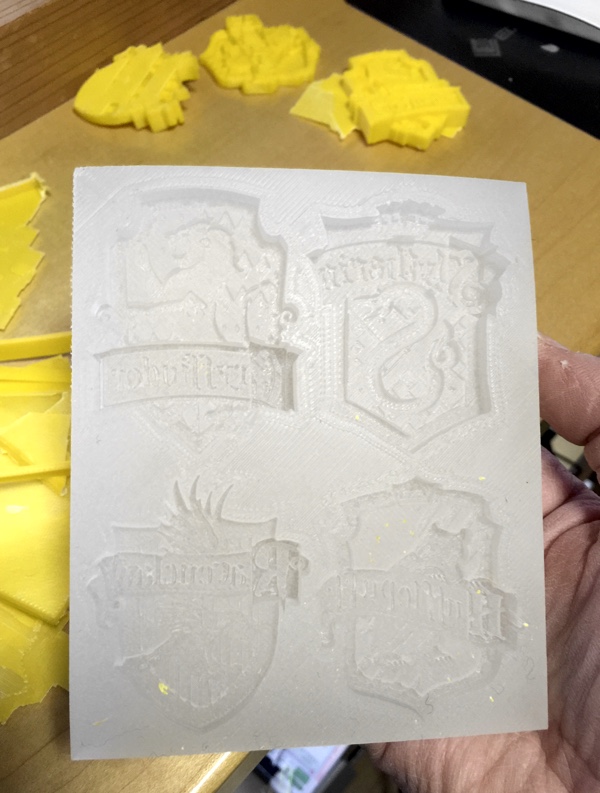
The first step is to create and print the box and positive model that will be cast in food safe silicone. I downloaded the crest models and modified Anna’s original OpenSCAD file to work with the models. I spent quite a bit of time modifying the program to be able to dynamically change the sizes of the box, the desired output size, and evenly distribute the maximum the number of crests in the box. Unfortunately, due the to properties of the original crest models, OpenSCAD was unable to render and produce a final stl file with the crests.
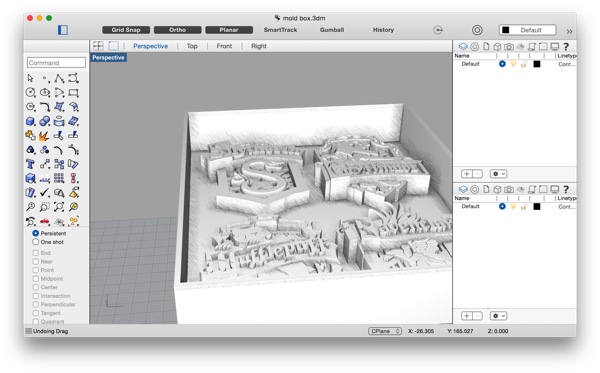
Instead, I imported the box model into Rhino from OpenScad, placed the crests models in the box, and generated the stl for printing.
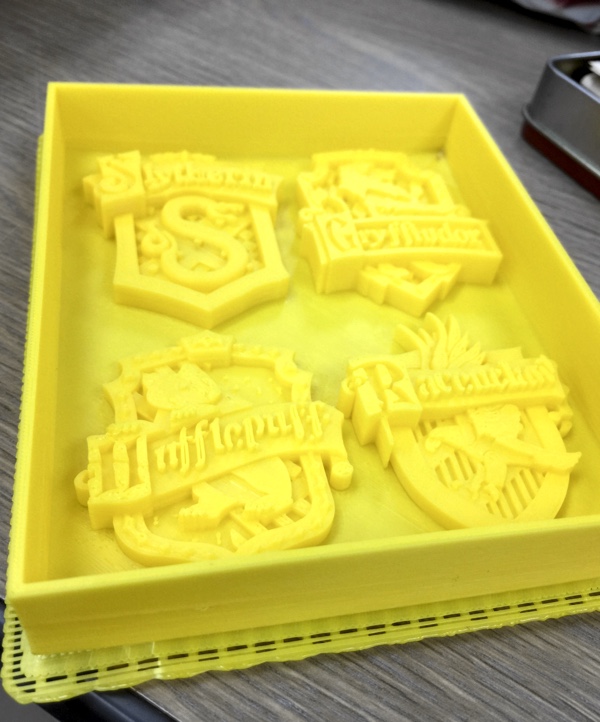
The print came out well, but due to the reduced sizes of each crest some of the fine detail was lost, especially around the lettering. Less detailed models will not only print better, but produce silicone mold that is easier to use. Eventually, the box will need to be destroyed to remove the cured mold, so do not make the printed box so thick or strong that you can’t easily tear it apart. A wall thickness of 1.3mm produced a mold maker with no significant leaks that was easy to tear apart.
I purchased 1kg of very easy to use food safe silicon from Amazon. This silicon reacts badly to water or pollutants on the print, environmental contaminants such as tobacco smoke, and will not set properly in low temperature environments. A temperature controlled room, a careful cleaning with alcohol, and a complete drying is recommended.
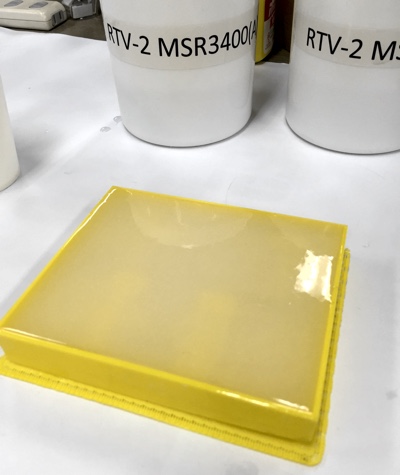
To calculate the required amount of silicon for the mold, subtract the volume of each crest from the the volume of the box. Next I measured out half the volume of both the A and B materials into 2 paper cups, poured them into a 3rd larger cup, and gently mixed them together. Care must be taken to make sure the two materials are throughly blended together while not introducing air bubbles into the final mixture. The silicon I used has a working time of about 30 minutes and I spent that time tapping the box from all sides and the bottom to remove air bubbles. The details of the design trapped a surprising amount of air and the final mold has a couple small bubbles that were trapped in the crevasses of the design. The temperature needs to be controlled as the silicon cures over the next 8 hours. I left the heat in the room and while it was cooler in the room than recommended, there where no problems. The next morning I was able to remove the cured silicon mold from the printed box by tearing apart the box with my hands and a needle-nose pliers.
On to the chocolate!
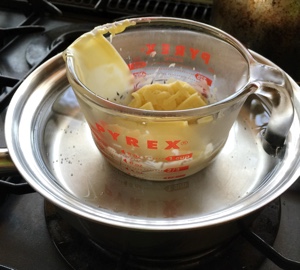
I next melted bars of white chocolate using a glass measuring cup and a water bath, being very careful not to get any water in the chocolate or drip water into the mold. It will save you time and trouble if you can get chocolate that doesn’t require tempering. Unfortunately, my chocolate did. To temper the chocolate, I first heated the chocolate up to about 46 C monitoring the temperature is an IR thermometer. Next, while gently stirring I cooled it down to below 27 C. Again care must be taken to not introduce air bubbles into the chocolate while stirring especially as it thickens. Finally, I reheated the chocolate to about 32 C and gently poured it into the mold while tapping to help it spread evenly and minimise bubbles. The chocolate sets up quickly so a smooth but relatively fast pour is recommended, but be careful not to trap excessive air in the mold.
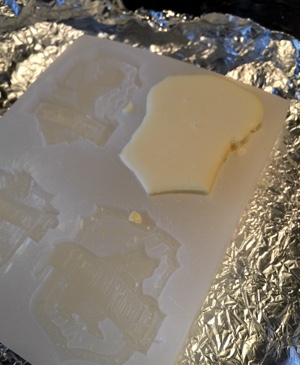
Due to the detailed faces of the crests, the chocolates stuck quite firmly in the mold but the thinness of the design made them very easy to break. It’s not good for the chocolate, but I had to completely freeze the mold in order to successfully remove the chocolates. Even so, frozen chocolate is very brittle and I ended up breaking quite a few of the Gryffindor and Slytherin crests, probably due to the large variations in thicknesses from lettering to the underlying animal motifs. I susspect that a design with a more consistent thickness would be considerably easier to demold successfully. Fortunately, broken chocolates can be melted and reuse to try-try-again.

The final results came out better than I had expected, even if the lettering is not very distinct.
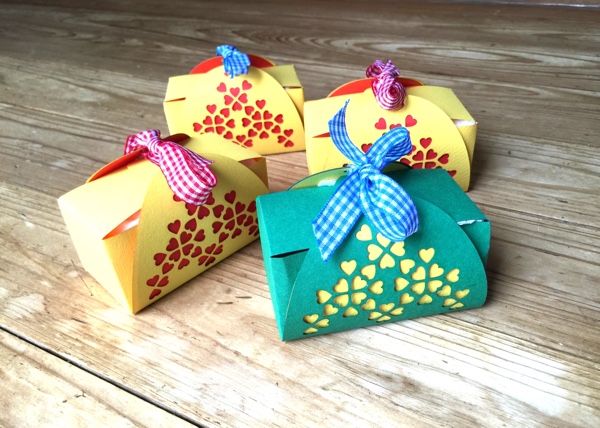
For the finishing touch, I laser cut some of my Valentine’s Day gift boxes which are the perfect size for a set of four chocolates.